Are you struggling to maintain proper oral hygiene with your permanent retainer? You’re not alone. Nearly 50% of orthodontic patients report difficulty cleaning around their fixed retainers, according to a study in the American Journal of Orthodontics and Dentofacial Orthopedics. But don’t worry—with the right techniques and tools, you can effectively clean under your permanent retainer and maintain excellent oral health.
What Are Permanent Retainers and Why Proper Flossing Matters
A permanent retainer (also called a fixed or bonded retainer) is a thin wire that’s bonded to the back of your teeth to prevent them from shifting after orthodontic treatment. Unlike removable retainers, permanent retainers stay in your mouth 24/7, which makes them convenient but also creates unique cleaning challenges.
Failing to clean properly under your permanent retainer can lead to:
Try Our Dental Calculators
- Plaque buildup and tartar formation: The hidden areas under your retainer wire create perfect spots for bacteria to colonize and form sticky plaque that hardens into tartar.
- Gingivitis and gum disease: Bacteria trapped under the retainer wire can inflame your gums, leading to bleeding, swelling, and potentially more serious periodontal issues.
- Cavities between teeth: Food particles and bacteria that remain trapped between teeth can cause decay in these difficult-to-reach areas.
- Bad breath: Bacteria buildup under the retainer produces unpleasant odors that regular brushing alone cannot eliminate.
- Possible retainer failure: Calculus buildup can create pressure on the wire and adhesive, potentially causing the retainer to loosen or detach from your teeth.
As Dr. Mark Burhenne, DDS, founder of AsktheDentist.com, explains, “The area behind fixed retainers is one of the most commonly neglected spots in oral hygiene routines, yet it’s often the most vulnerable to plaque accumulation.”
The Challenges of Flossing with Permanent Retainers
Before diving into techniques, it’s important to understand why flossing with a permanent retainer is challenging:
- Physical barrier: The wire blocks traditional flossing methods by creating a physical obstruction that prevents the normal up-and-down motion of floss between teeth.
- Limited visibility: You can’t easily see behind your teeth where the retainer is bonded, making it difficult to assess if you’ve cleaned properly.
- Awkward angles: Reaching behind front teeth requires greater dexterity and coordination, especially when trying to navigate floss around the permanent wire.
- Time constraints: Proper cleaning takes significantly longer than regular flossing, often requiring 5-7 minutes compared to the typical 2 minutes for standard flossing.
Despite these challenges, developing an effective flossing routine is essential for your long-term oral health.
Essential Tools for Flossing Around Permanent Retainers
The right tools make all the difference when cleaning around your permanent retainer. Here are the most effective options:
1. Floss Threaders

Floss threaders are thin, flexible plastic tools that help guide regular dental floss under your retainer wire.
Advantages:
- Inexpensive (typically $3-5 for a pack)
- Allow you to use your preferred dental floss
- Widely available at pharmacies and grocery stores
Disadvantages:
- Require a two-handed technique
- Can be awkward to manipulate at first
- Disposable and create plastic waste
2. Orthodontic Flossers/Super Floss
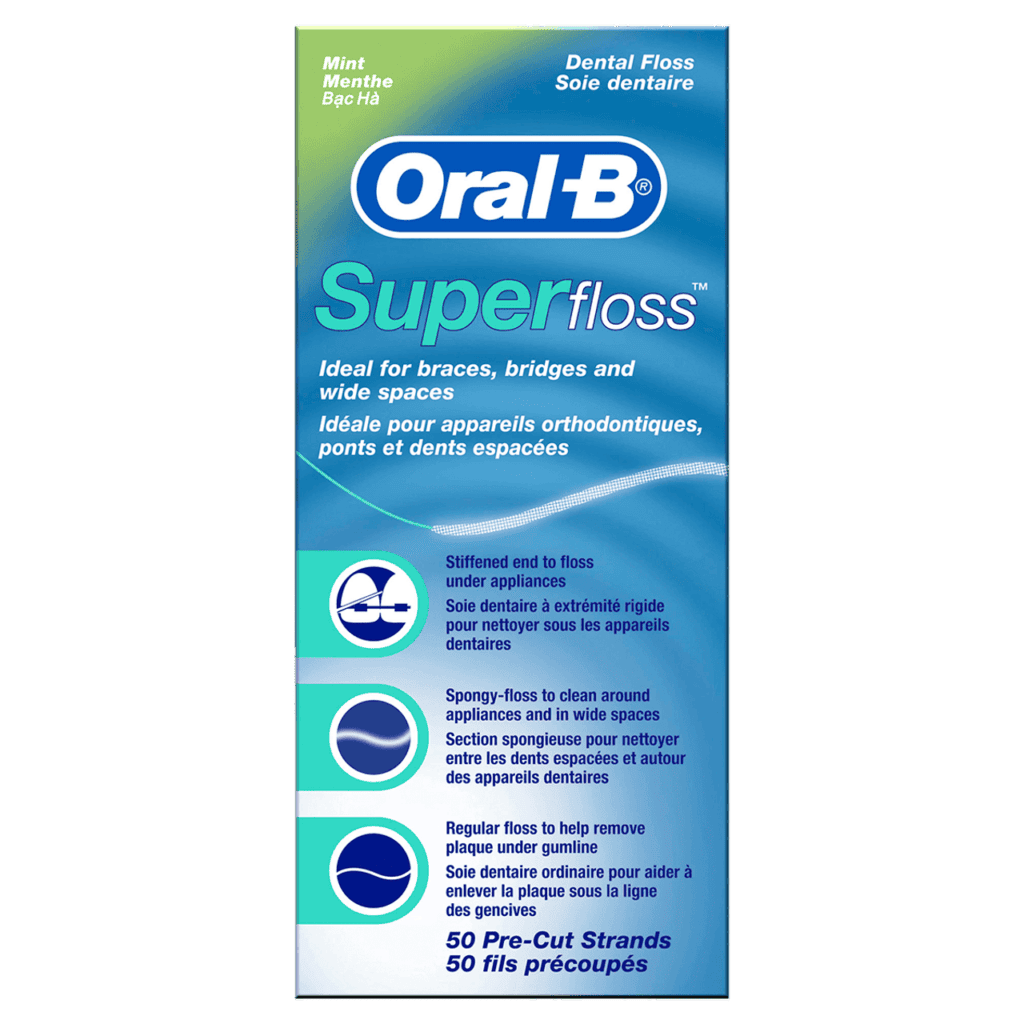
Specialized flossers designed specifically for braces and permanent retainers feature a stiff end for threading and a fluffier section for cleaning.
Advantages:
- Combines threader and floss in one product
- The fluffy section cleans more surface area
- Often easier for beginners
Disadvantages:
- More expensive than regular floss ($4-8 per pack)
- Less flexibility in choosing floss type
- Limited uses per strand
3. Water Flossers/Oral Irrigators
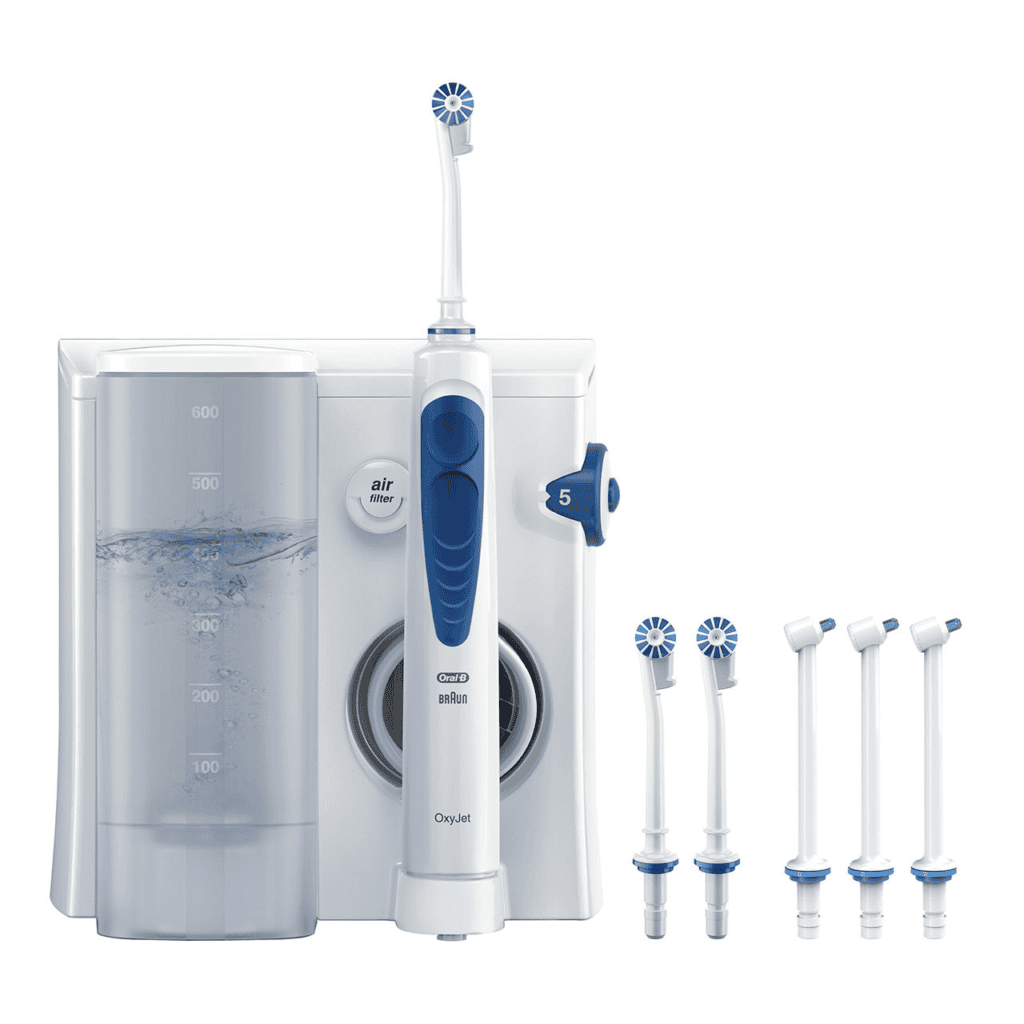
These devices use a pressurized stream of water to clean between teeth and under the retainer wire.
Advantages:
- Easier to use than manual flossing options
- Can reach areas difficult to access with traditional floss
- Studies show they remove up to 99.9% of plaque from treated areas
Disadvantages:
- Higher initial investment ($30-100 depending on model)
- Requires electricity/charging and counter space
- Can be messy when first learning to use
4. Interdental Brushes
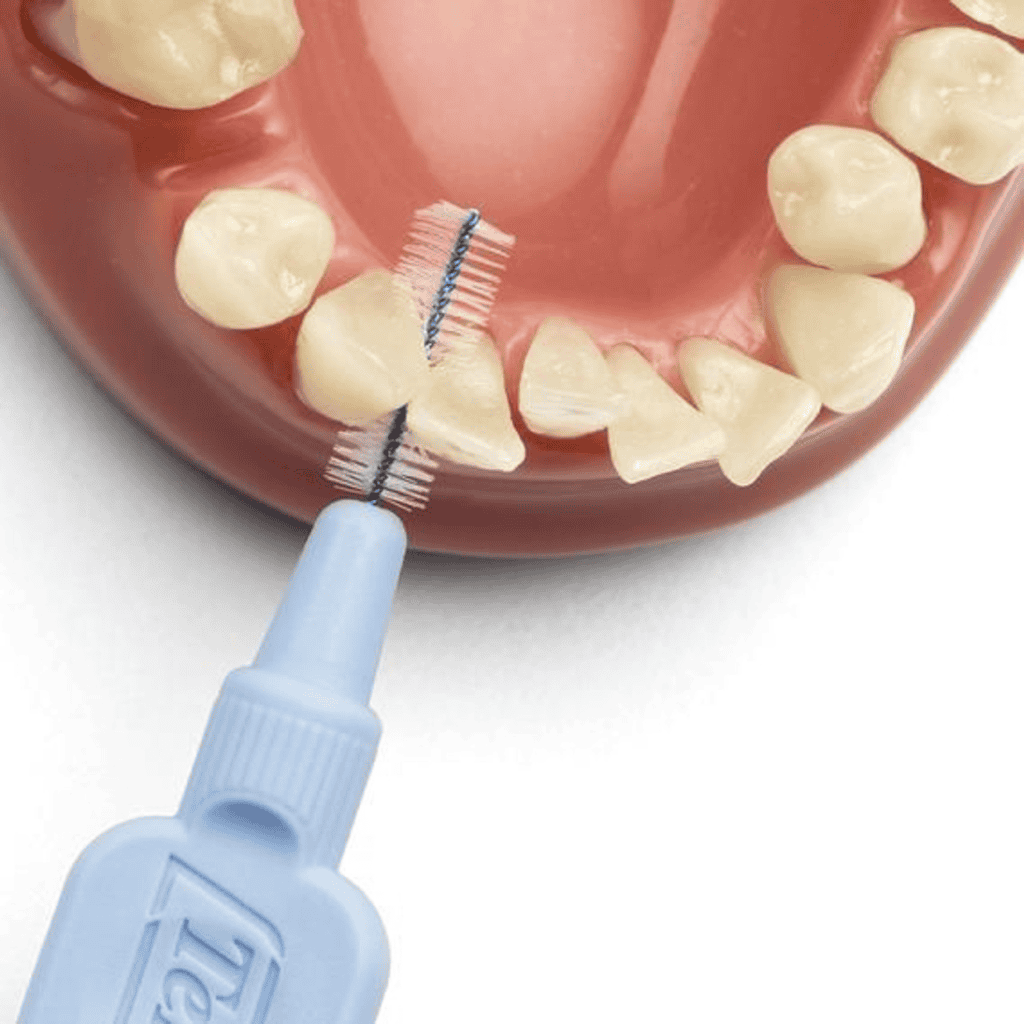
These tiny brush tips can slide under and around retainer wires to remove plaque.
Advantages:
- Quicker to use than threading traditional floss
- Reusable for several days
- Effective at removing larger food particles
Disadvantages:
- May not clean as thoroughly between teeth
- Need replacement every few days
- Can damage gums if used too aggressively
Step-by-Step Guide to Flossing with a Floss Threader
For most people, floss threaders provide the best balance of effectiveness and affordability. Here’s how to use them properly:
- Gather your supplies
- Dental floss (18-24 inches)
- Floss threader
- Mirror
- Good lighting
- Thread the floss
- Pass about 2-3 inches of dental floss through the eye of the threader
- Hold the threader in one hand and the ends of the floss in the other
- Position the threader
- Locate the space between two teeth that have the permanent retainer
- Place the pointed end of the threader under the wire, facing upward (for bottom retainers) or downward (for top retainers)
- Guide the threader through
- Gently push the threader between your teeth and up/down under the wire
- Pull the threader completely through, bringing the floss with it
- Floss normally
- With the floss now positioned under the wire, wrap it around your fingers as usual
- Clean both teeth by creating a C-shape around each tooth and gently moving the floss up and down
- Remove and reposition
- Carefully pull one end of the floss to remove it from under the wire
- Move to the next space between teeth and repeat
Important tip: Work systematically from one side to the other to ensure you don’t miss any spaces.
Using a Water Flosser Effectively with Permanent Retainers
Water flossers are gaining popularity for their ease of use with permanent retainers. According to a 2019 study in the Journal of Clinical Dentistry, water flossers removed 29% more plaque than string floss in orthodontic patients. Here’s how to use one effectively:
- Fill the reservoir
- Use lukewarm water (cold water may be uncomfortable on sensitive teeth)
- Consider adding a small amount of alcohol-free mouthwash for additional freshness
- Start with low pressure
- Begin at the lowest setting, especially if you’re new to water flossing
- Gradually increase as you become comfortable
- Proper positioning
- Lean over the sink to avoid mess
- Close lips slightly around the tip to prevent splashing
- Keep the tip at a 90-degree angle to the gumline
- Focus on the retainer area
- Aim the water stream directly at the retainer wire
- Move slowly from tooth to tooth, pausing briefly between each
- Pay extra attention to the areas where the wire is bonded to your teeth
- Complete coverage
- After focusing on the retainer, clean around all other teeth
- Target the gumline and between all teeth
A water flosser typically costs between $30 for basic models to $100 for premium versions with multiple settings and attachments. Many dentists consider this a worthwhile investment for permanent retainer wearers.
Creating an Effective Daily Routine
Consistency is key for maintaining oral health with a permanent retainer. Here’s a recommended daily routine:
Morning:
- Brush teeth thoroughly (2 minutes minimum)
- Use an interdental brush for quick cleaning around the retainer
After meals:
- Rinse vigorously with water
- Use interdental brushes if possible to remove food particles
Evening (most important):
- Brush thoroughly with fluoride toothpaste
- Floss under the retainer using your preferred method
- Use antimicrobial mouthwash to help reduce bacteria
Pro tip: Keep interdental brushes or floss picks in your bag, car, or desk for quick cleaning when you’re away from home.
Common Mistakes to Avoid
Even with the best intentions, many people make these common mistakes when flossing around permanent retainers:
- Using too much force: Aggressive flossing can traumatize your gum tissue, causing inflammation and recession. It can also place excessive pressure on the retainer wire and adhesive points, potentially weakening the bonds and loosening the retainer. Instead, use gentle, controlled movements with light pressure.
- Inconsistent cleaning: Skipping even a day or two allows plaque to begin hardening into tartar, which cannot be removed by flossing alone. Bacterial colonies also establish stronger biofilms when left undisturbed. Develop a consistent daily routine and make it a non-negotiable part of your hygiene regimen.
- Rushing the process: Proper cleaning around a permanent retainer typically takes 3-5 minutes initially (improving to about 3 minutes with practice). Rushing through the process inevitably leads to missed areas, particularly the crucial spots where the wire attaches to your teeth.
- Ignoring warning signs: Bleeding gums, persistent bad breath, or visible white or yellow buildup around the retainer are clear indications that your cleaning technique needs improvement. If these symptoms persist for more than two weeks despite improved cleaning, consult your dentist as they may indicate more serious issues.
- Attempting to clean a loose retainer: If you notice any movement in your permanent retainer or if it feels loose, stop flossing around it immediately and schedule an appointment with your orthodontist. Continued manipulation of a compromised retainer could completely detach it, requiring a more complex replacement procedure.
Insurance Coverage and Cost Considerations
Maintaining your oral hygiene with a permanent retainer involves certain costs. Here’s what you should know about coverage and expenses:
Insurance Coverage for Oral Hygiene Tools
| Tool Type | Typical Insurance Coverage | Average Out-of-Pocket Cost |
|---|---|---|
| Basic Floss & Threaders | Not covered | $3-8 per month |
| Specialized Orthodontic Floss | Sometimes covered with prescription | $5-10 per month |
| Water Flosser | Partially covered by some dental plans | $30-100 (one-time purchase) |
| Interdental Brushes | Rarely covered | $4-12 per month |
| Professional Cleanings | Covered 80-100% (typically 2 per year) | $75-200 without insurance |
Note: Many Flexible Spending Accounts (FSAs) and Health Savings Accounts (HSAs) allow you to use pre-tax dollars for these oral hygiene tools, potentially saving you 20-30%.
Cost-Benefit Analysis
While spending extra on specialized cleaning tools might seem unnecessary, consider that:
- The average cost to repair a single cavity is $150-$300
- Treatment for moderate gum disease typically costs $500-$1,500
- Replacing a damaged permanent retainer can cost $250-$500
Investing $100-200 annually in proper cleaning tools represents significant savings compared to treating preventable dental problems.
Professional Care and Maintenance
Even with excellent home care, professional attention remains essential:
Regular Dental Cleanings
Most dentists recommend 3-4 month cleaning intervals for patients with permanent retainers, instead of the standard 6 months. These more frequent cleanings help:
- Remove hardened tartar that home care can’t address
- Identify potential issues before they become serious
- Ensure the retainer remains securely bonded
- Monitor gum health around the retainer
Professional Evaluations
Your dentist or orthodontist should periodically check your permanent retainer for:
- Secure bonding to each tooth
- Wire integrity and position
- Signs of excessive wear or distortion
- Proper tension and function
Most orthodontists recommend an annual check of your permanent retainer, often covered by insurance as a “limited orthodontic treatment” visit with a typical copay of $25-75 depending on your plan.
When to Consider Alternatives
Despite best efforts, some people struggle to maintain adequate hygiene with permanent retainers. Consider discussing alternatives with your orthodontist if:
- You consistently develop calculus under the retainer despite diligent cleaning
- You experience recurrent gum inflammation around the retainer
- You have limited dexterity that makes proper cleaning impossible
- You develop allergies or sensitivities to the retainer materials
Alternative retention options include:
- Vacuum-formed clear retainers worn at night
- Hawley retainers (removable with wire and acrylic)
- Night-only bonded retainers (less common)
Quick Review
- Permanent retainers require special flossing techniques due to the wire barrier
- Essential tools include floss threaders, orthodontic floss, water flossers, and interdental brushes
- Consistent daily cleaning is crucial for preventing plaque buildup and gum disease
- Professional cleanings every 3-4 months help maintain optimal oral health
- The cost of proper tools ($100-200/year) is much less than treating preventable dental problems
- Consider alternatives if maintaining hygiene with a permanent retainer proves too difficult
Remember that your permanent retainer helps preserve your beautiful smile—and proper cleaning ensures both your teeth and gums stay healthy for life.
By mastering these techniques and incorporating them into your daily routine, you’ll keep your smile looking and feeling great for years to come.
